
Garage sale shopping really paid off with my $7 curtain find this spring! As soon as I saw them I knew I had to have them! They were going to look so lovely as a dress!

I already had a pattern in mind, too, the 1770’s Polonaise pattern by Period Impressions. I picked up this pattern at a local historical costuming shop and was wondering how it would fit. Not wanting to try it out on my striped silk (which is still sitting in the bag it came in, by the way- will pluck up the nerve to use it soon!) this seemed like a perfect alternative! I love the late 18th century gowns with mitered seams!
So first things first- Time to make the lining! I used cotton since this wasn’t going to be a historically accurate dress – the curtains are a poly – something or other. I could tell right away that the pattern size wasn’t going to work so I added on to each of the pieces about 1/2 an inch at the seams. After finishing the lining I tried it and seemed like it was going to work! On to the fashion fabric!

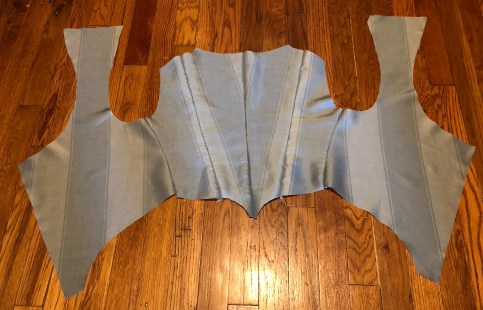
I was working with a limited amount of fabric so I had to be really choosy on how I cut out my bodice. This was especially challenging for the mitered back and front pieces.

I cut out the back pieces first and then moved onto the front. The following pictures (with the bodice front) show how I was able to make the mitered seams work. I thought about getting a protractor but after moving the first piece around a bit it eventually became clear where the next piece would come from.


Time to assemble the bodice! I machine sewed the lining together, then bodice together and then attached the two together along the neckline. Then I hand sewed over all edges. Yea! I have a bodice! At first I thought it looked too Victorian (with the neck line so high) but I went with it and when I added the trim later it looked fine.


On to the skirt! Since the skirting was originally curtains with trim already sewn (and again this was all just a rough draft run anyway) I sewed the bottom halves of 2 curtains together. Ha! Trim done ! 🙂 In retrospect I wish I had taken the original edge of the curtains at the middle seam off because it ended up being bulky but it’s staying for now!
To attach the skirt I hand pleated starting at the center and working out each way. I pinned as I went then machine stitched down the pleats. To keep the pattern in the striping visible I pleated the stripes to half their size. This even lined up to the center stripe on the bodice which is a nice bonus! Next, I hand sewed the skirting on to the bodice careful to make sure the pleats laid nicely when on my dress form.


Sleeves! This was a different pattern for sleeves. I really like the J. P. Ryan jacket pattern where the curve is built in. This pattern had a marking to stitch up an elbow bend but I opted to just leave them as they are. To attach the sleeves I machine stitched the bottom of the armsyce to the bodice and then hand stitched the top between the fashion fabric and lining. (I also hand stitched the top of the shoulder down at this point as well). Getting close now!


Trim! I have seen this trim lately and love it so I decided to try it out. Using excess curtain fabric the first thing I did was, with the fabric inside out, I sewed the trim into a tube. Next, after I turned it right side out, I ironed it flat. Then, setting my machine on the longest stitch setting, I sewed down each side of the trim- making sure to secure the far end of the thread so I don’t pull it all the way out. Then, You pull the thread through on the loose end until you get the ruching you want. I left one end loose so I could adjust the trim as I hand sewed it onto the bodice. It has a lovely effect and a lot less time consuming than box pleats (though I love those, too!). I added trim to the collar and sleeves.


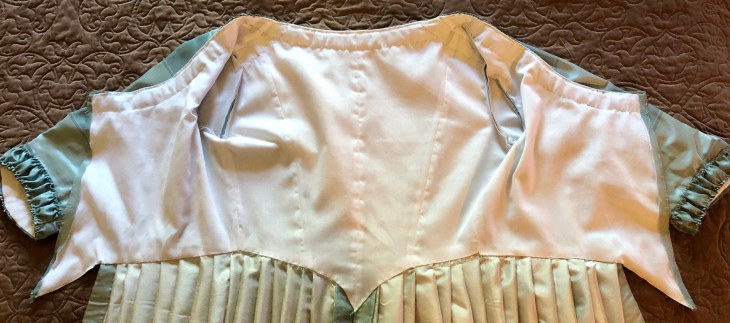
Bodice is finished! Here is the inside view of the bodice:
Hat- I followed Modern Mantua Maker’s excellent blog post for making a fab 1780’s hat! Here is the link to her blog post: https://themodernmantuamaker.wordpress.com/2018/04/11/how-i-made-my-1780s-tall-crown-hat/
She can explain it way better than I can! Materials used were buckram, wire (millinery wire would be best, but I couldn’t find any at my local crafting store so I used jewelry wire with the same gauge), flannel lining (I only had this whimsical polka dot so for it bit it looked more Mad Hatter than anything else!) and fashion fabric – satin in this case.


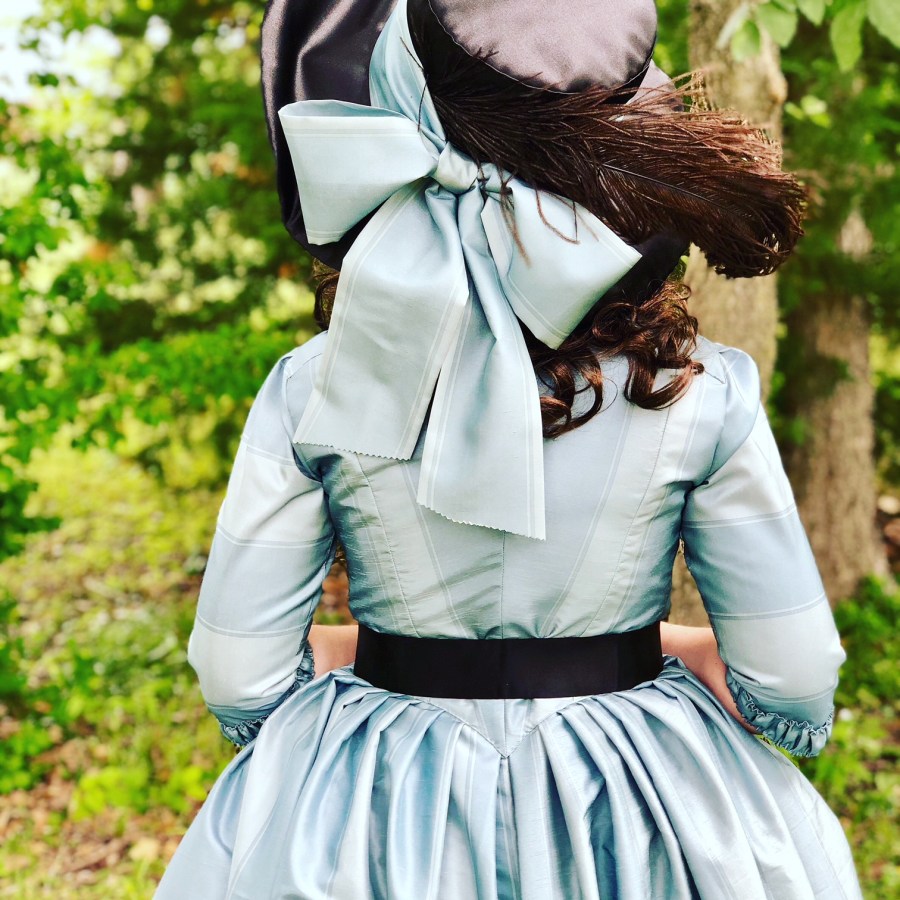
To decorate the hat I used left over fashion fabric as a bow and a black ostrich feather I had lying around.

Done! For the rest of the ensemble I used my usual underpinnings (shift, stays, kerchief, puffer, under petticoat, silk stockings) white cotton petticoat, black belt with costume gemstone buckle and American Duchess Fraser shoes.


This ensemble is so fun to wear! This may be my favorite dress (and HAT!) I have made so far. After looking at the final pictures I decided that I need to add some split bum pads in the future for a fuller look in the back and ties under the skirt to be able to draw it up in a polonaise style!
